Craft + Sew Kid Fun Recipes Home and Garden Tutorials Life

Friday, December 28, 2012

{Crispy Chicken Tacos with Avocado, Cabbage and Chipotle Mayo}


This week, I'm putting a spin on taco night. Crispy Chicken Tacos with Chipotle Mayo features fresh ingredients, loads of crunch and a touch of heat. A fabulous departure from the ground beef staple we're used to.


Crispy Chicken Strips:
1 lb chicken breast cut into strips
1 cup flour
2-3 cups Panko
2-3 eggs
Cooking spray

Roll chicken in flour to coat. In a separate dish, beat eggs slightly. Dip chicken in the egg and then roll in Panko. Spray a large baking sheet with olive oil spray. Arrange strips on pan. Spray additional oil olive on top.

Bake at 350° for 20-30 minutes or until crispy and completely cooked through.


Chipotle Mayo:
3/4 cup mayonaise
2-3 chipotle peppers in Adobo sauce

In a food processor combine mayonnaise and chipotle peppers. Puree until smooth.

For Assembly:

Package soft tortilla shells
Avocado, sliced. 
Purple cabbage, shredded
Salsa


Arrange chicken strip on a tortilla shell. Add salsa, avocado and cabbage to taste. Top with heaping spoonful of chipotle mayo. Serve immediately.


Wednesday, December 26, 2012

{Make: Magnetic Alphabet}


 Here's a project that will eat up even the smallest bits of your scrap collection--you know, the ones you really should have thrown away. Even better, you'll be able to replace those cheap, plastic refrigerator magnets and bring a tiny bit of your fabric style into the kitchen!

For this project, you will need:
-Assorted fabric bits
-Mod Podge
-Wooden alphabet
-X-Acto/craft knife
-Sharp scissors
-Adhesive-backed magnetic strips


Here are the wooden letters I'll be using. I found these buggers at Wal-Mart in the craft section. 


These are thin, so I recommend sorting in pairs and gluing them together for extra thickness.


Poor Q didn't have a partner so I paired him with the extra O. They make a great team! <3


Letters just about to get pretty! 


Apply a coat of Mod Podge and place a scrap on top.


Let dry.


Start cutting around the letters with scissors or a craft knife. The craft knife will give you a sharper edge if that's what you're going for.


Pause for small child to play.


Add the adhesive magnetic strips. You'll need to cut them to size. If you find that the adhesive is not strong enough,  glue them on.


That's it! I hope they make your refrigerator look fabulous!


Saturday, December 22, 2012

{Cookie Cutter Honey Roasted Peanut Bark}


The kids and I have been working on last minute Christmas gifts this week. We're making this (not so) fancy honey-roasted peanut bark for our chocolate-loving aunties. I had the idea of using holiday cookie cutters to shape the chocolate and make it a bit more festive. You can try this with any kind of bark!

You will need:
2 cups semi-sweet chocolate chips
1 tablespoon shortening
1/2 cup honey roasted peanuts
Assorted cookie cutters
Waxed paper


Melt chocolate and shortening in a double boiler or microwave in short 30 second bursts until melted. Line a large pan with waxed paper and arrange cookie cutters. Working quickly, pour chocolate into cookie cutter shapes and top with peanuts.


 Take a heavy pan or baking dish and place it on top of your cookie cutters to prevent the chocolate from seeping out. Let cool. 


Carefully pop the bark out of their molds and indulge!

---------------------------

A sneak peek of our week via Instragram:
Find me @ nurdyburdie.


Tuesday, December 18, 2012

{Weight Loss Attempt #809809789}

Accountability is what I need, so I'm putting it out there: This girl's bulge has started to droop a little too far over the belt for comfort. The weight from my pregnancy with Avery has never come off and let's be honest, she's almost 3, I can't be using that as an excuse anymore. There's only one good thing that comes from carrying a few (or twenty) extra pounds and that is boobs--large, droopy boobs. But even then large, deflated ta-tas, unholstered, will combine with that jelly roll to give one the shape of...well nothing. But I digress.

Full disclosure here: I am 148 pounds and 5'5" tall. My goal is to lose twenty pounds in the next three months. That's a little less than two pounds a week. Totally doable if I can chart my eating and get up off this lazy ass of mine!

I think I can, I think I can.

On a side note: I am working on a few new recipes and craft tutorials! I hope to start putting them on the blog later this week! 


Friday, December 14, 2012

{What We're Reading}


My name is Ashley and I'm a children's book addict. Living 30 minutes from the nearest library, which is small and crappy to boot, forces a woman to buy and horde them. Oh and they make me happy too! 

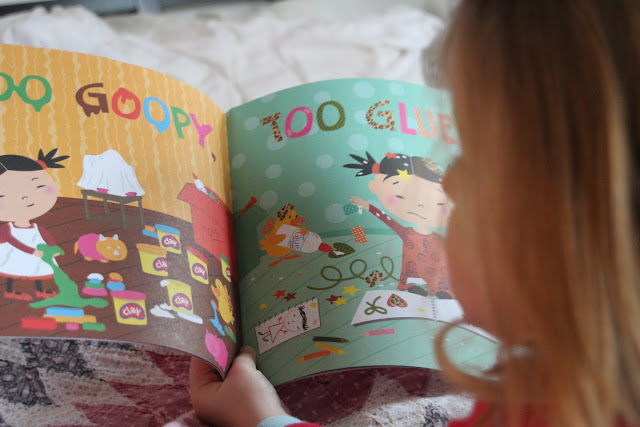
Too Princessy by Jean Reidy 


Not too wordy, literally two words per page, with cute illustrations. Perfect for a two year old who likes to memorize and "read" stories herself.

Pajama Pirates by Andrew Kramer

The illustrations are darling and while I found the storyline sort of meh, the kids seemed to enjoy it. 

If You Take a Mouse to the Movies by Laura Numeroff

If you've ever read the first, this version follows the same formula. A nice, easy read for Christmas time.


Thursday, December 13, 2012

Vegetarian Southwestern Salad


A perfect, healthful lunch or dinner salad for two. It takes the traditional taco salad and omits the taco and ground beef. However, fiber-rich black beans and avocado happily fill that oh so lonely space. Even better, I've calculated the calorie content for this dish and was pleasantly surprised it came in at 335 calories. Woot!

Calories per serving: 335 
Makes 2 servings

You will need:
1 cup canned black beans, drained
1/3 cup salsa
3 tablespoons sour cream
1 avocado, cubed
2 cups lettuce (I used a Spring Mix, use whatever you have or like)
2 tablespoons shredded cheddar or Mexican blend cheese
1 tsp taco seasoning (use the stuff in the packets or make your own)

Microwave black beans for about a minute or until warm. Make the dressing in a separate bowl by combining sour cream, salsa and taco seasoning.Combine your slightly heated beans, lettuce, avocado and dressing. Top with cheddar cheese and optional hot sauce to taste. Enjoy!


Wednesday, December 12, 2012

{Congratulations, Sister}


Mad props to my baby sister for graduating from VCU over the weekend! We are so very proud of her! Sista worked hard and earned it. Go girl!


Snapshot of our week:
Find me on Instragram as nurdyburdie


Friday, November 23, 2012

Eat, Drink and Be Merry!


Wishing a fabulous start to the Christmas season to one and all!


Thursday, November 22, 2012

Puffy Paint Snowman and Being Thankful

It's cold, Avery and I are bugging each other, and I realized that we need more craftiness in our lives. Since our move, arts and crafts have a taken a backseat in our daily routine. How could I let this happen?! I live and die by the glue gun! Not anymore, my friends, not anymore. This crafty lady is back in action. But let's not start off with a project too ambitious. Here's an easy one--a totes adorns fluffy, puffy snowman. And the best part? You make your own puffy paint! 

For the Puffy Paint you will need:
1 bottle of white school glue
1 bottle of foam shaving cream like Barbasol or the Dollar General brand as shown in the pic

and then...

Mix 1 part glue with 1 part shave cream.

That's it!


To Decorate:
Small paint brush
Construction Paper (for base as well as accessories)
Scissors
Raisins (eyes)
Pretzel sticks (arms)
Other ideas are mini-m&ms, candy corn, licorice strings, etc. Use your imagination! 


Your child's creation may well look like Frosty endured an icy typhoon. Avery's sure did. In her defense, she is two, and following directions is not really her thing. A four or a five year old could bust out some fabulous snowmen though! Give it a try; it really is fun at any age!

----------------------------------------------------------------
So what are you grateful for this Thanksgiving?


We have a lot to be thankful for and I'll bet you do to! Without going into too much detail, (don't want to drag this whole post down) this last year was incredibly trying for us as a family. I'm thankful that we're finally seeing the light at the end of the tunnel.


I'm thankful for our home. Grateful that we even have a home. It's beautiful and peaceful way out here and we're happy to be near family.


I'm so lucky to have these goobers in my life. They are completely hilarious, each with their own quirky weirdness that I adore! They get that from both of us.


Of course, we appreciate our friends. They're always nice to have around. ;-)


I'm so thankful for the good days, where we all seem to "mesh" just so.


We're lucky to have those chaotic days too. Makes me appreciate the awesome ones that much more.


Speaking of being thankful, I've been reading a lot about happiness lately and gratitude is key to being satisfied. Wanting what you have brings more happiness than having what you want. I am really working towards practicing gratitude in my daily life--something I also want to instill in my children. This gives me an idea for another post.


This Thanksgiving we have so much to be thankful for! We really, really do! 

---------------------------------

Random Instragram photo dump:
Find me on Instragram as Nurdyburdie.

Happy Thanksgiving!